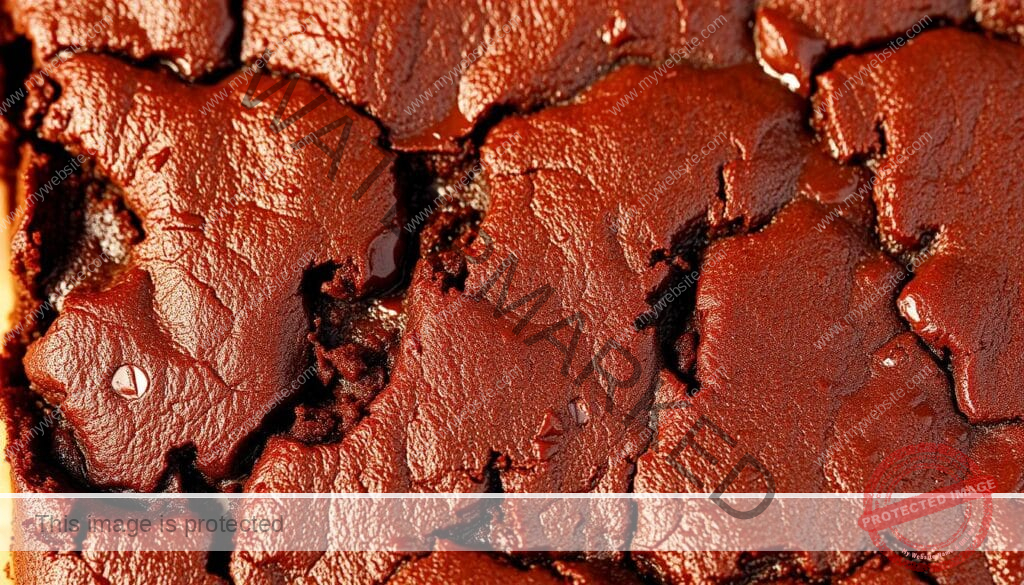
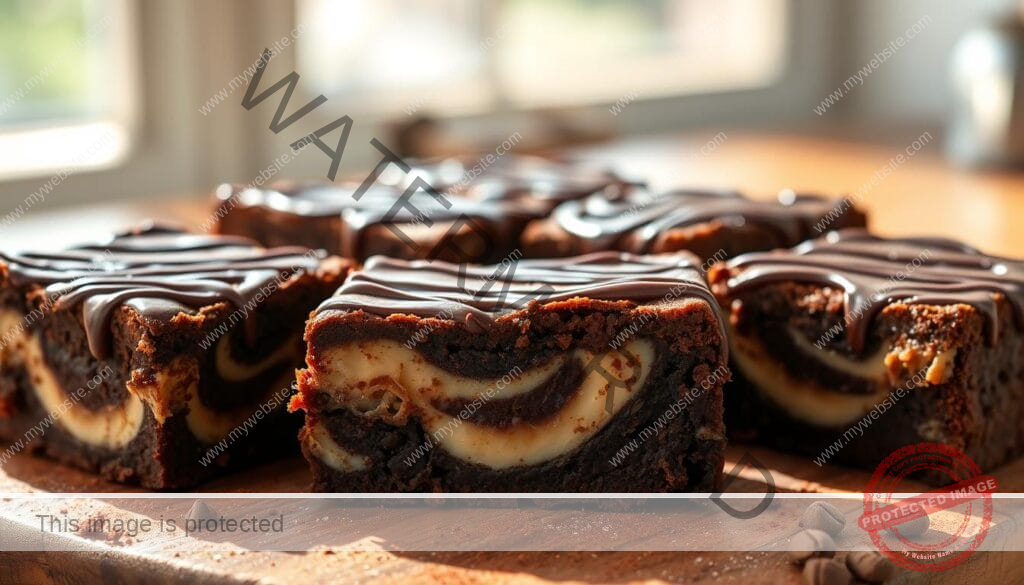
Have you ever craved a dessert that’s both rich and easy to make? Look no further. Condensed milk brownies have taken social media by storm, and for good reason. These treats combine the fudgy texture of classic brownies with the creamy sweetness of sweetened condensed milk, creating a dessert that’s hard to resist.
What makes this recipe stand out? It’s beginner-friendly and uses pantry staples you likely already have. Whether you’re a busy mom or a baking novice, you’ll appreciate the simplicity. With just a few ingredients, you can whip up a batch in 35-45 minutes.
Marley Goldin’s highly-rated recipe, with a 4.94/5 star rating, proves just how irresistible these brownies are. The crispy edges and chewy center make every bite a delight. Ready to transform your baking game? Let’s dive in!
Why You’ll Love These Brownies with Condensed Milk
Want a treat that’s rich, moist, and incredibly easy to make? These desserts are a game-changer. Their ultra-rich texture comes from the creamy sweetness of sweetened condensed milk, which keeps them fudgy and chewy. As they cool, they transform from cakey to dense, making every bite irresistible.

One of the best parts? The contrast between the crispy edges and the gooey center when warm. This perfect balance of textures is what makes them a viral sensation, with over 143+ ratings on TikTok. Plus, you don’t need baking powder—just a few simple ingredients for that fudge-like consistency.
Here’s why this recipe stands out:
- One-bowl preparation means less cleanup.
- They stay fresh for up to 3 days at room temperature.
- Freezer-friendly for up to 4 months.
- Customize with swirls or mix-ins like chocolate chips.
Whether you’re a college student or a busy parent, this recipe is college student-approved for its simplicity. Add a sprinkle of sea salt for that perfect salty-sweet balance. Ready to bake something unforgettable?
| Feature | Benefit |
|---|---|
| Rich Texture | Fudgy and chewy every time |
| Quick Prep | Ready in under an hour |
| Customizable | Add chocolate chips or swirls |
Ingredients for the Perfect Fudgy Brownies
Easy Condensed Milk Brownies
Condensed milk brownies are a rich and fudgy dessert that can be made with just a few ingredients. Here’s a simple recipe that fits the bill:
- Prep Time: 5 minutes
- Cook Time: 25 minutes
- Servings: 16
- Temperature: 160℃ (140℃ for fan ovens)
Ingredients:
- 250 g Dark chocolate: (8.8oz)
- 397 g Sweetened condensed milk: (14oz)
- 100 g Plain flour: (3.5oz)
Equipment Needed:
- Saucepan
- Mixing bowl
- 8×8-inch tin
- Oven
Instructions:
- Preheat your oven to 160℃ (140℃ for fan ovens). Line an 8×8-inch tin with baking paper.
- Break up the chocolate and add it to a saucepan with the condensed milk. Place over low heat, stirring occasionally until the chocolate has melted.
- Remove the pan from the heat and stir in the flour. Work quickly as the mixture will start thickening.
- Transfer the brownie mixture to your lined tin and bake for 20-25 minutes. The brownies are ready when a crust has formed on top.
- Let the brownies cool in the tin for around an hour at room temperature. Once cooled, slice and enjoy!
Safety Notes: Ensure the oven is at the correct temperature and handle hot items with care.
Substitutions: Use milk chocolate for a sweeter taste, or substitute the flour with almond flour for a gluten-free option.
Storage: Store in an airtight container at room temperature for up to 3 days. They can also be frozen for up to 2 months.
Pro Tips:
- Work quickly when adding the flour to avoid over-thickening the mixture.
- For a gooier center, reduce the baking time by 5 minutes.
- Letting the brownies cool completely before slicing helps them hold their shape better.
This recipe is easy to follow and yields delicious, fudgy brownies with a gooey center.
Ready to bake something indulgent yet simple? The secret to these treats lies in the ingredients. Using the right components ensures a rich, fudgy texture that’s hard to resist. Let’s break down what you’ll need to create this crowd-pleasing dessert.
Essential Pantry Staples
Start with basics like flour, eggs, and unsalted butter. Room temperature butter is key for proper creaming, ensuring a smooth batter. Don’t forget vanilla extract—doubling the quantity adds a deeper flavor profile.
For that chocolatey goodness, grab cocoa powder. Dark cocoa powder intensifies the flavor, while regular cocoa keeps it classic. Melted chocolate chips work better than whole ones, creating a velvety texture.

The Secret Ingredient: Sweetened Condensed Milk
This recipe calls for sweetened condensed milk, not evaporated milk. The former adds creaminess and sweetness, while the latter lacks the necessary sugar content. A standard 14oz can is perfect for this recipe.
Leftover condensed milk? Store it in an airtight container in the fridge for up to a week. It’s great for coffee or drizzling over pancakes.
Optional Add-Ins for Extra Flair
Customize your dessert with fun additions. A peanut butter swirl adds a nutty twist, while a sprinkle of sea salt enhances the sweet-salty contrast. If you’re using salted butter, adjust the added salt to avoid over-seasoning.
For a chocolate overload, fold in extra chocolate chips or drizzle melted chocolate on top. The possibilities are endless, making this recipe your new go-to.
Step-by-Step Instructions for Brownies with Condensed Milk
Looking for a foolproof way to bake a crowd-pleasing dessert? Follow these simple steps to create a treat that’s rich, fudgy, and impossible to resist. From prepping your pan to testing for doneness, we’ve got you covered.
Prepping Your Pan and Oven
Start by lining your 13×9 pan with parchment paper. This sling technique ensures easy removal and clean edges. Cut the parchment paper long enough to hang over the sides, making it simple to lift your dessert out after baking.
Preheat your oven to 350°F. A properly heated oven is key to even baking and that perfect fudgy texture. If you’re using a larger pan, adjust the bake time to 30 minutes.
Mixing the Batter Like a Pro
In a large bowl, cream softened butter and sugar until light and fluffy. This step incorporates air, giving your dessert a tender crumb. Use a hand mixer for small batches or a stand mixer for larger quantities, depending on your needs.
Scrape the edges of the bowl regularly to prevent dry pockets. This ensures all ingredients are evenly mixed for a smooth batter. Fold in chocolate chips for an extra layer of indulgence, distributing them evenly for consistent flavor
Baking and Testing for Doneness
Pour the batter into your prepared pan and smooth the top. Bake in the preheated oven, checking for doneness after 25 minutes. Instead of the toothpick method, try the shake test. If the center is set and doesn’t jiggle, it’s ready.
Once baked, transfer the pan to a cooling rack. This allows air to circulate, preventing sogginess and ensuring the perfect texture. For clean cuts, chill the dessert in the fridge for 15 minutes before slicing.
With these steps, you’ll create a dessert that’s as beautiful as it is delicious. Happy baking!
Expert Tips for the Best Results
Want to elevate your baking game with pro-level tips? These expert tricks will help you achieve the perfect texture and flavor every time. From softening butter to storing your treats, we’ve got you covered.
Start with room temperature eggs and butter. Cold ingredients can lead to uneven mixing, affecting the final texture. If you’re in a hurry, microwave the butter in 10-second bursts until soft but not melted.
Sift clumpy cocoa powder to avoid lumps in your batter. This ensures a smooth, velvety consistency. For a richer flavor, try using dark cocoa powder or add a pinch of sea salt top for a sweet-salty contrast.
When doubling the recipe, use the right pan size. Overcrowding can lead to uneven baking. If you’re baking multiple batches, layer parchment paper for easy removal and cleanup.
Store your treats in an airtight container to keep them fresh. Avoid plastic wrap, as it can trap moisture and make them soggy. For longer storage, freeze them for up to 4 months.
Here’s a quick guide to troubleshooting common issues:
| Issue | Solution |
|---|---|
| Stale Texture | Microwave for 10 seconds to revive |
| Underbaked Center | Return to oven for 5 minutes |
| Overmixed Batter | Fold gently to maintain density |
Finally, test your oven’s accuracy with a thermometer. An oven that’s too hot or cold can ruin your ingredients. With these tips, you’ll bake like a pro every time!
Conclusion
Ready to impress with a dessert that’s both simple and indulgent? This recipe combines the creamy richness of condensed milk with the deep flavor of chocolate, creating a treat that’s hard to resist. With over 143+ ratings and a 4.94 average, it’s clear this recipe is a winner.
Feel free to experiment with mix-ins like nuts or swirls for a personal touch. The texture transforms as it cools, offering a fudgy center and crispy edges that are perfect for sharing. Pair it with a glass of milk or coffee for the ultimate experience.
Don’t forget to rate the recipe and share your creations online. With its adaptability for dietary needs and gifting potential, this dessert is a must-try. Stay tuned for exciting variations like cherry or dairy-free options!
Pro Tip: Use a hot knife for clean, professional cuts every time.
FAQ
Can I use dark chocolate instead of chocolate chips?
How do I prevent the brownies from sticking to the pan?
Can I substitute granulated sugar with another sweetener?
How do I know when the brownies are done baking?
Can I add sea salt on top?
How should I store leftover brownies?
Can I use unsalted butter instead of salted?
What’s the role of sweetened condensed milk in this recipe?
Bingback
